How to Effectively Maintain Your Drysuit
Please take a moment to read this to ensure you get the most from your drysuit.
Being a substantial investment and an integral component of your diving rig, it's important that you know how to correctly maintain your drysuit. Much like checking and maintaining the tyre pressures and oil level in your car, your drysuit requires regular maintenance to ensure it continues to work in harmony with you beneath the surface. The general construction and seals aside, let's take a look at the most important components of your drysuit:
Drysuit Valves
Both the inflation and exhaust valves should undergo periodic testing and examination by a competent and authorised service technician like Scuba Doctor Service and Repairs. A yearly full test is advised, and more if the suit is in frequent use. There are also some steps you should take before and after diving.
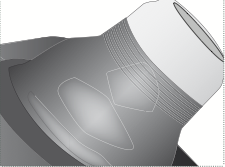 Before diving
The inflator and exhaust valve should be checked by connecting the regulator to an air tank and connecting the inflator hose to the inflator valve. Press the suit inflator valve to test. To test the exhaust valve, the neck and wrist seals must be plugged. This can be done with bottles or similar. Inflate the suit and press the exhaust valve to test. The suit should begin to deflate. If your suit is fitted with a cuff dump it will vent as you inflate the suit.
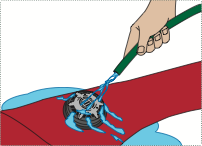 After diving
It is important to clean your valves after every dive. Your valves should be given the same care as a breathing regulator. After diving, always rinse the inflation and exhaust valves with cold running fresh water. To flush the inflation valve, simply connect the valve to an air supply and operate whilst flushing the push button area with water.
Top Tip: When dry, lubricate the O-ring of your inflation valve with silicone spray by spraying a few squirts into the coupling end of your drysuit inflation hose, connecting the hose to the drysuit, turning on the air supply and pressing the drysuit inflation button. The O-rings are then lubricated.
[ Top ]
Drysuit Zip
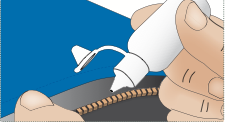 The drysuit zip seals on the inside teeth and rubber surface. An expensive component of a drysuit, the zip requires special maintenance and attention.
Before diving
Close the zip and lubricate it with Northern Diver's Zip Wax or Zip Oil. A complimentary pack is provided with every new drysuit.
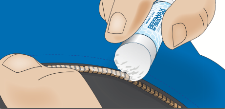 After diving
The zip must be fully opened before attempting to remove your drysuit. Failure to open completely may result in the zip being damaged. Clean the zip by rinsing with fresh water. If the zip is particularly dirty with sand or dirt after diving, it can be cleaned by using a toothbrush and fresh water (mild soapy water can be used for heavy soiling).
Lubricate the zip with Northern Diver's Bees Wax or Zip Oil by rubbing the brass components before each new dive and after cleaning.
Top Tip: Do not regularly use silicon spray on your zip, as this can cause the material to perish.
[ Top ]
General Drysuit Storage and Maintenance
 Top Tip: If you have latex seals, it is good practice to wash them after every dive with mild soapy water. This removes body oils and dirt, which can cause the seals to perish.
Having followed the procedures set out for your valves and zip, the drysuit should be stored in a cool, dry place away from direct sunlight and devices that produce ozone, such as motors and heaters.
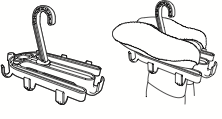
The suit should be hung up from the boots using a special drysuit hanger with the zip closed.
Believe it or not
Cats and rodents have been known to nest in drysuits! Always ensure your drysuit is stored in a way that would make it inaccessible to these potential homemakers.
If you have any specific enquiry about how to care for your dive gear, please feel free to contact The Scuba Doctor by email to [email protected] or by a telephone call to 03 5985 1700.

